S1 M8325S Kit Build Guide
What’s in the box
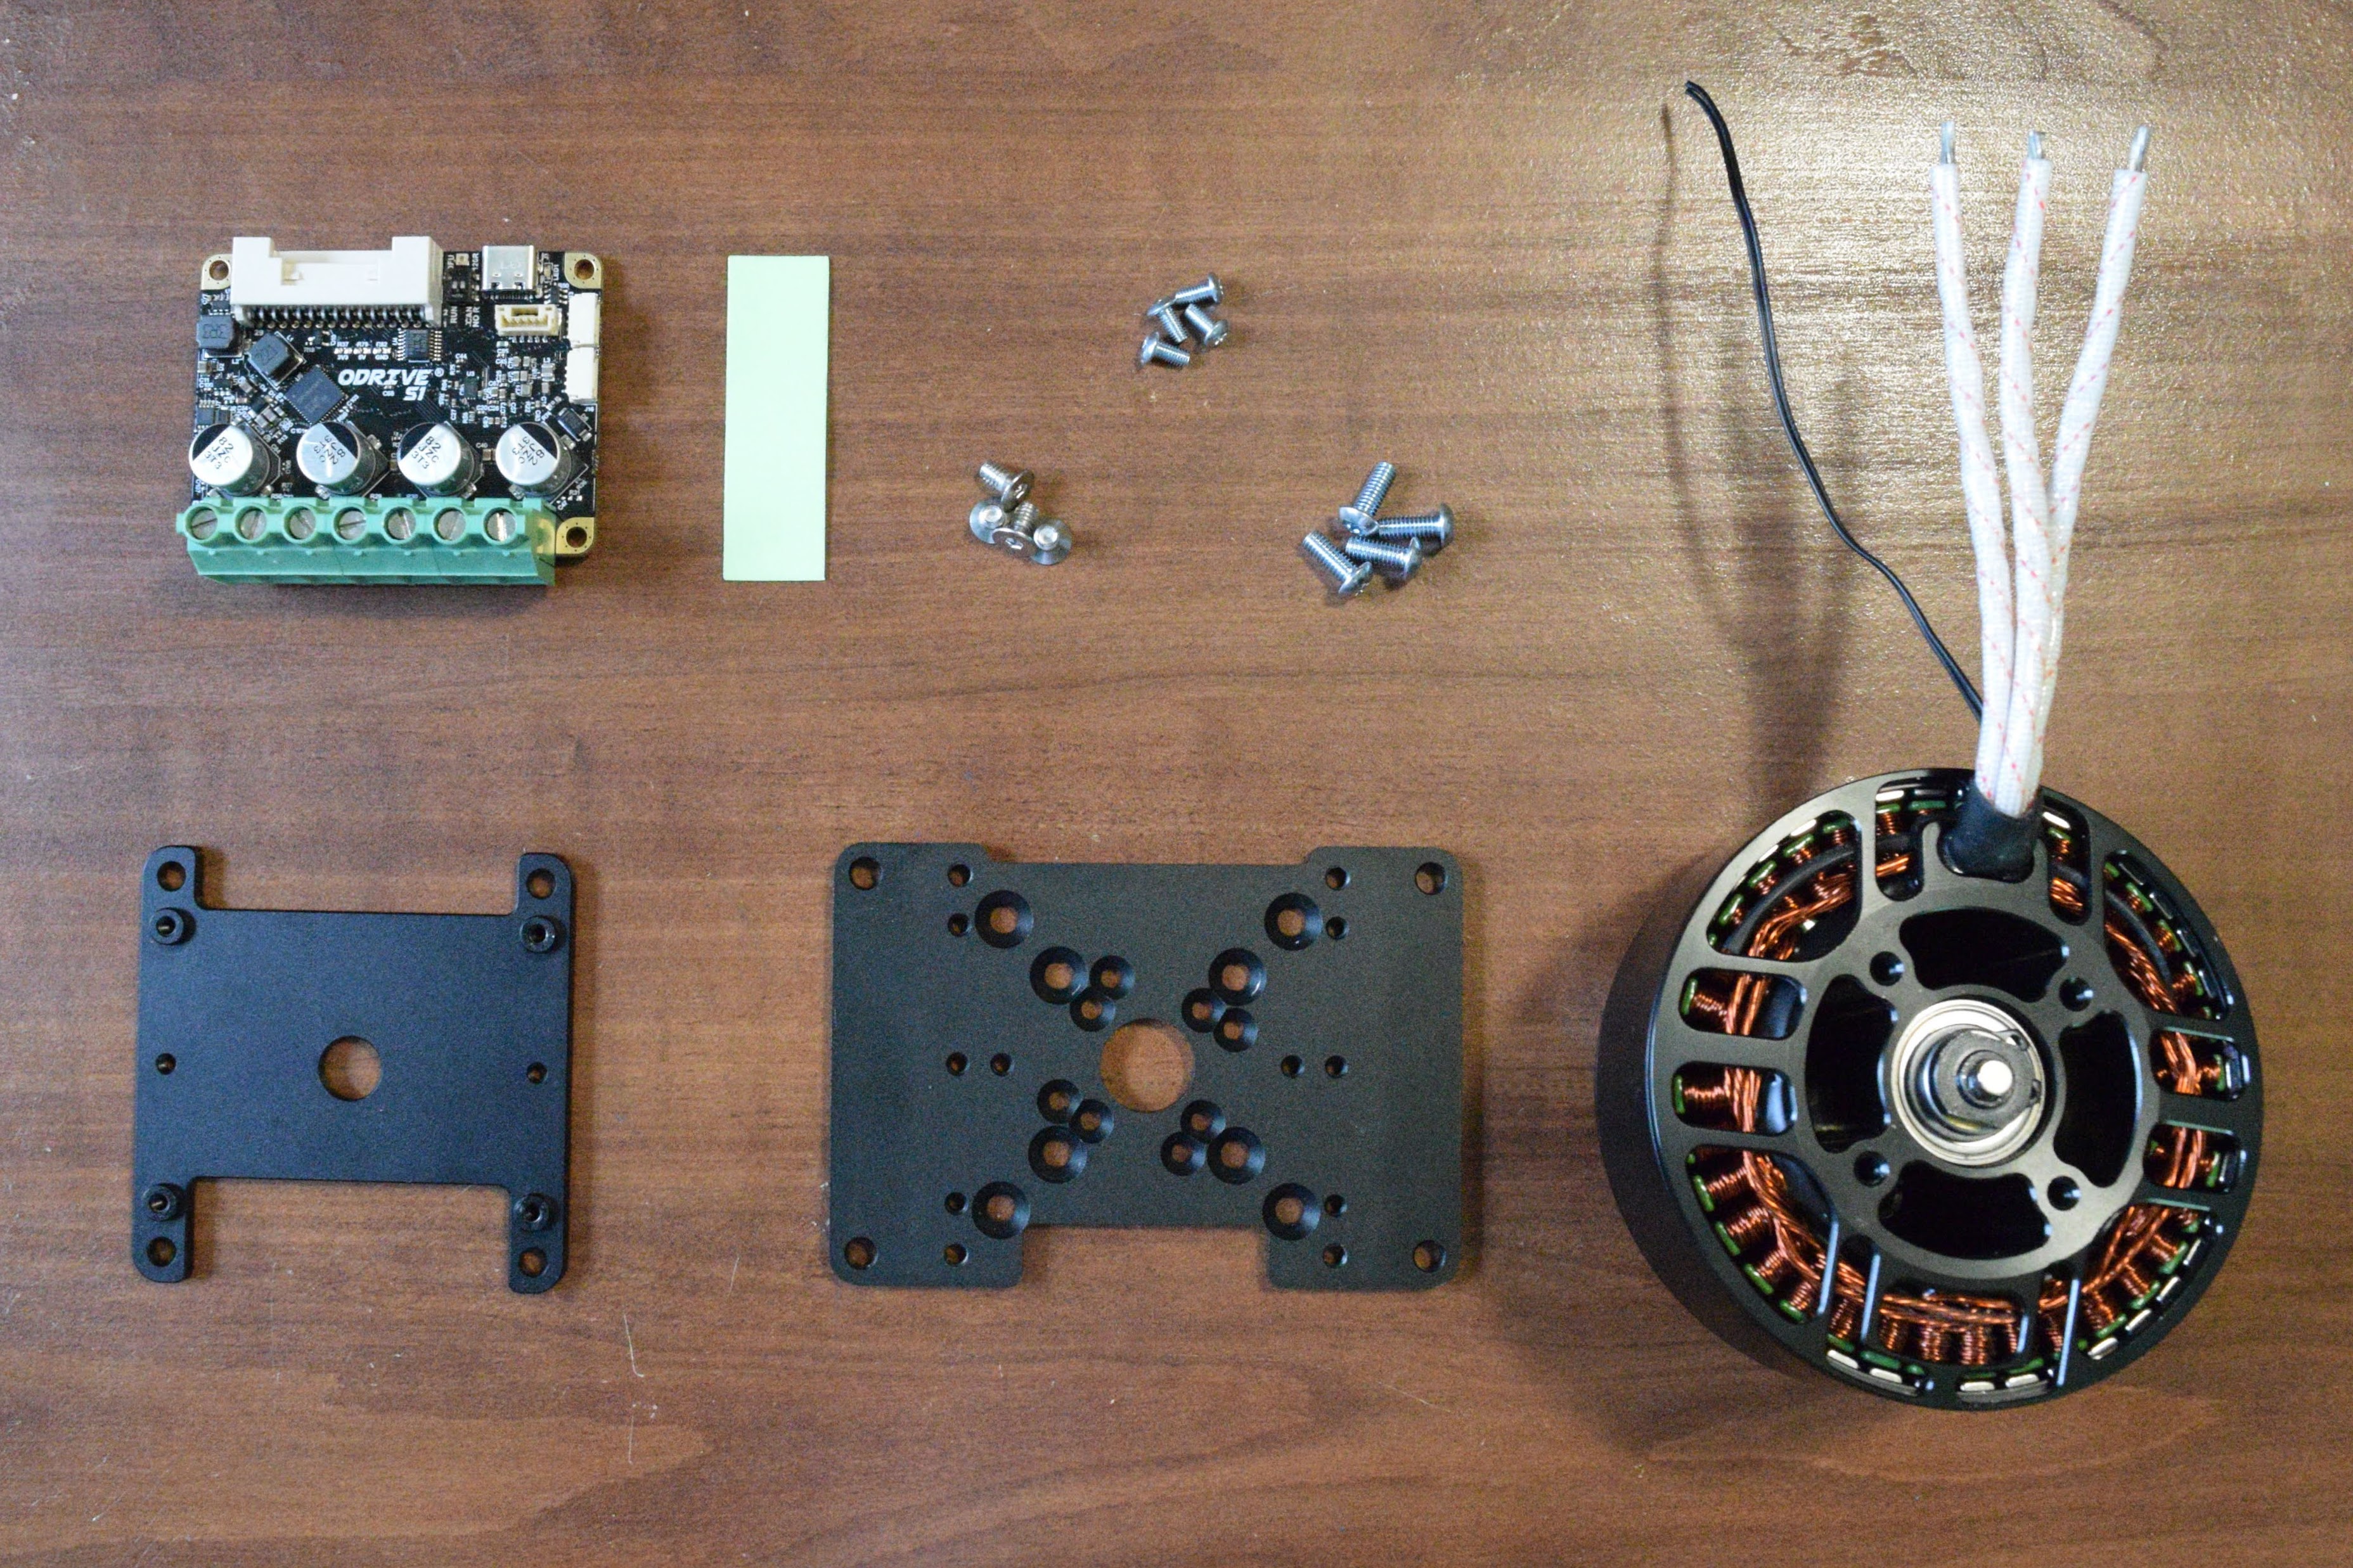
ODrive S1
ODrive S1 Heat Spreader Plate
Thermal Pad
4x M3x6mm BHCS
4x M4x10mm BHCS
4x M4x10mm Flat Head
ODrive Motor Mounting Plate
M8325S Motor
S1 Harness Build Kit
What you’ll need
Screwdriver - T10, T15, and T20 bits
If using thermistor: soldering iron and heatshrink
Wire for power supply and brake resistor
USB Isolator and USB-C cable
Hardware Setup
Apply Thermal Pad
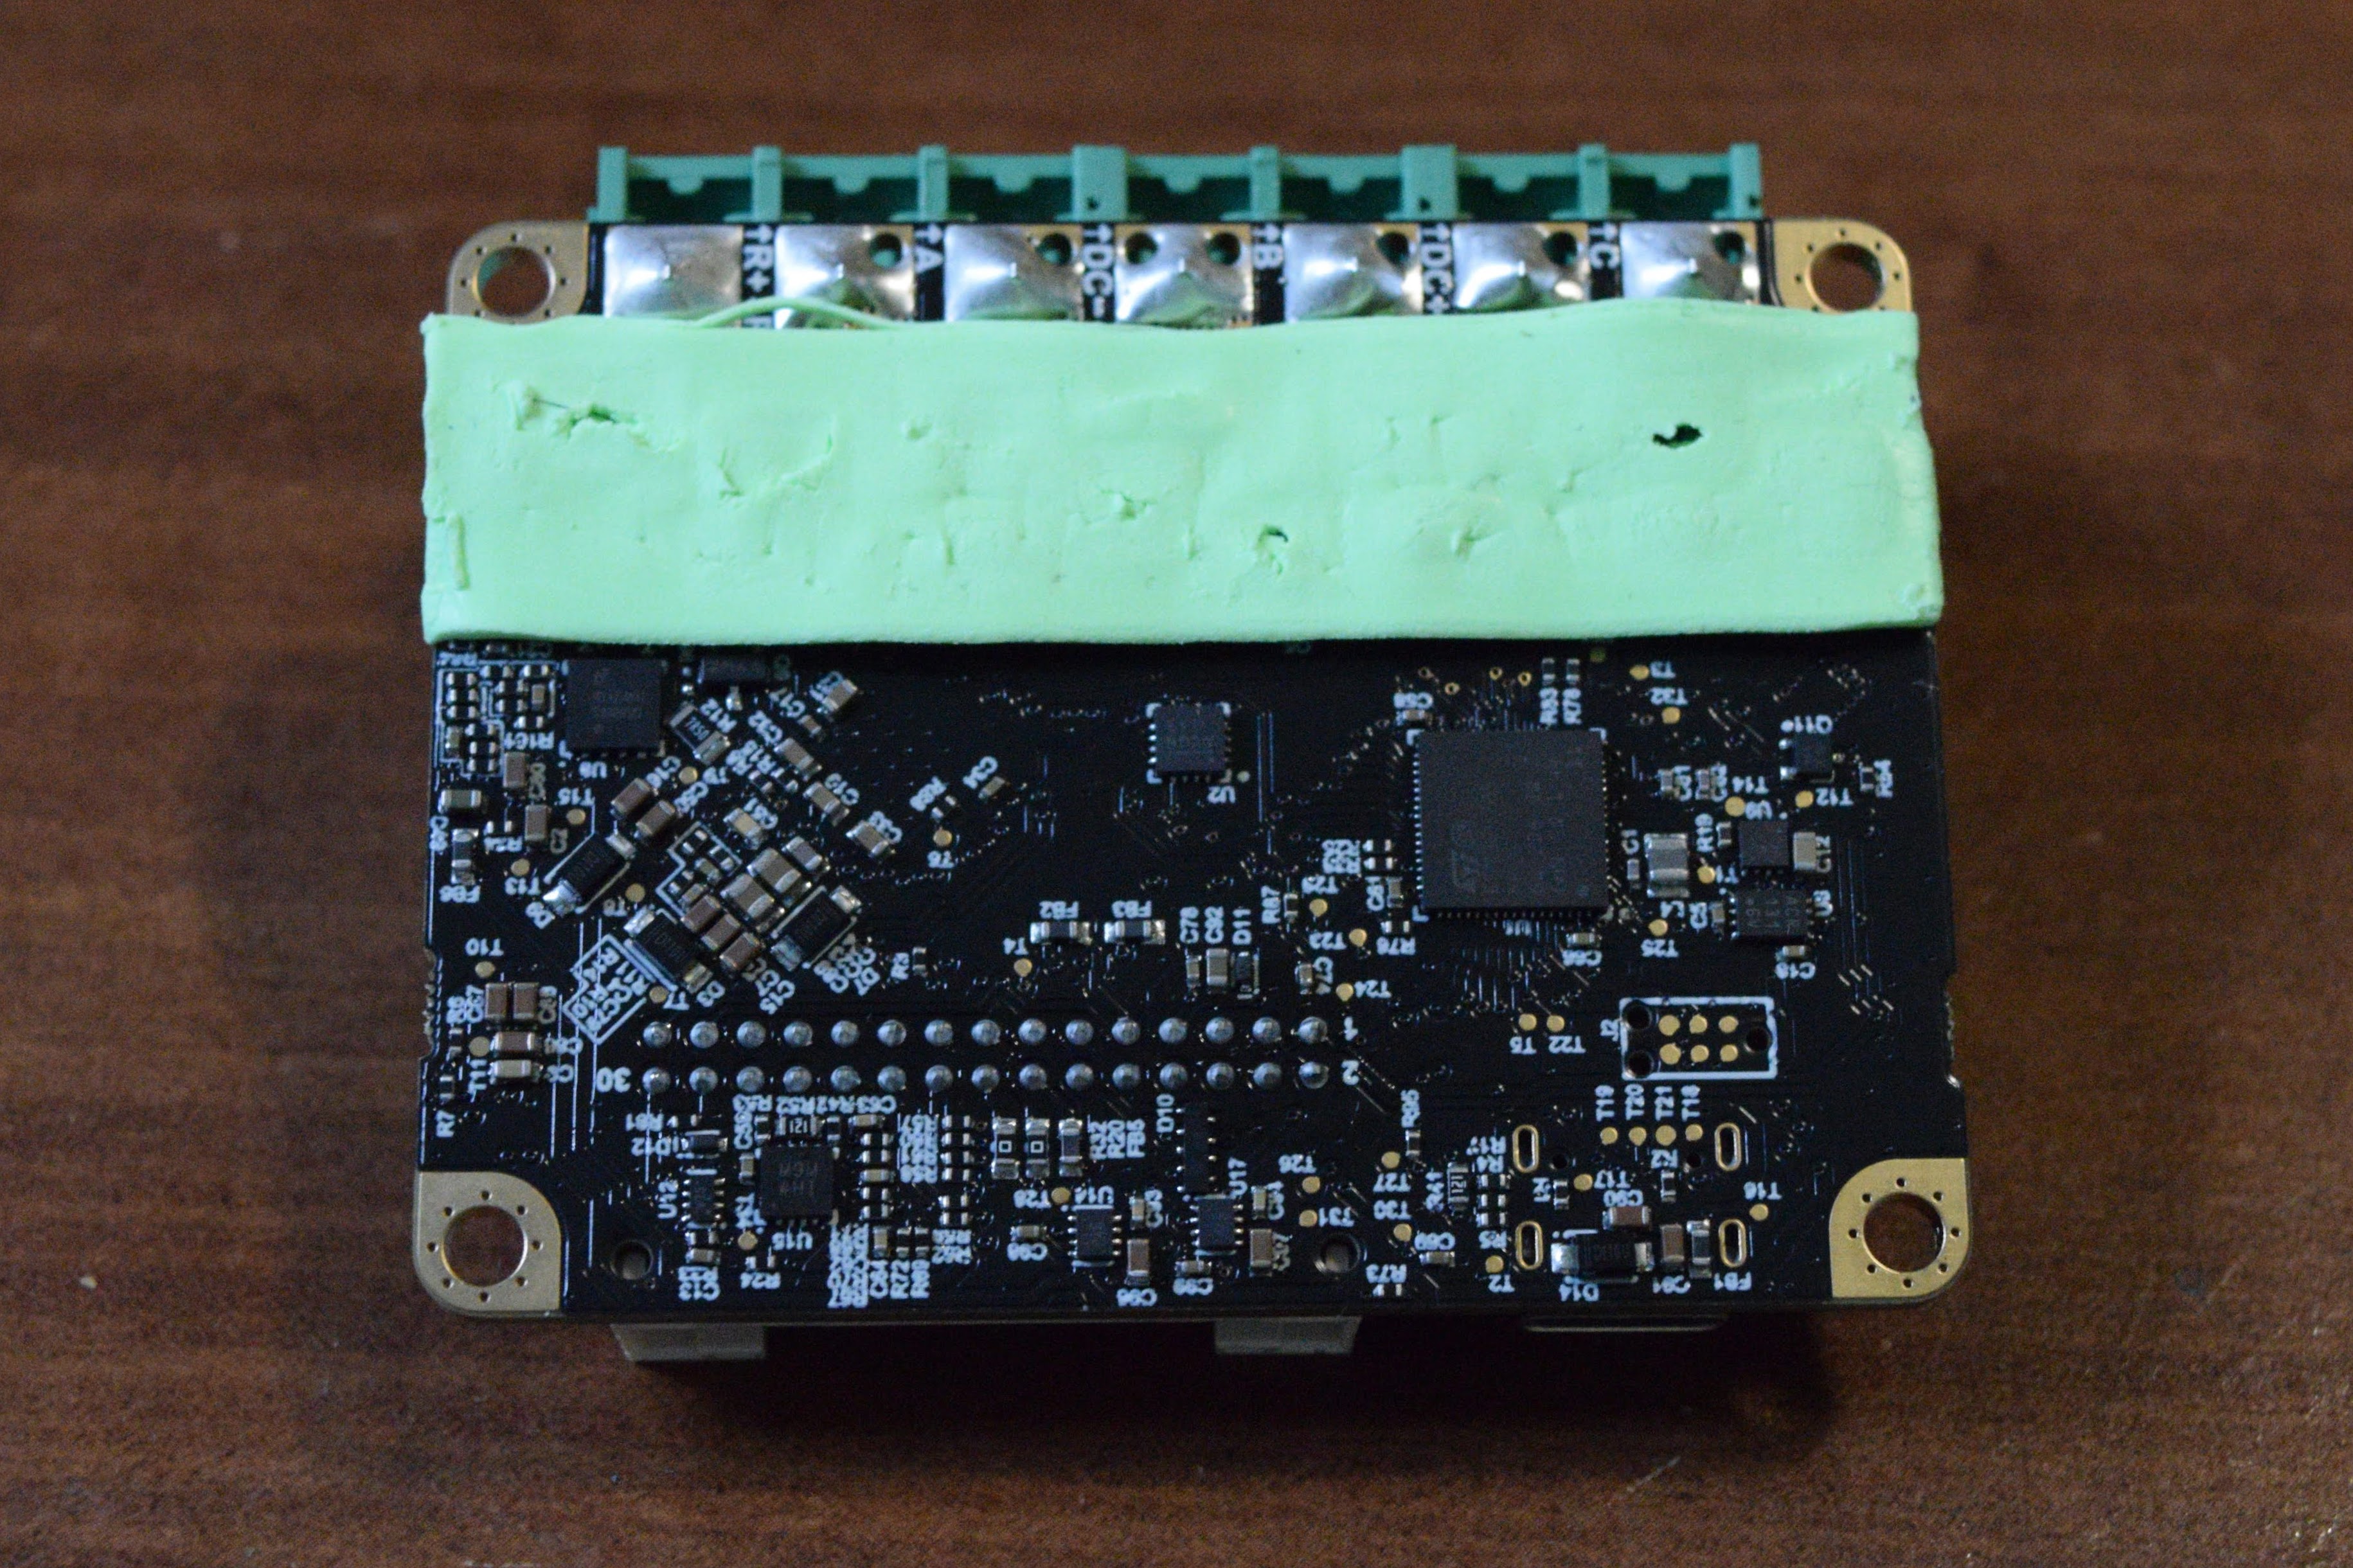
First, remove the protective film from both sides of the green thermal interface pad. Then, place it on the back of the S1 as shown in the picture. It doesn’t need to cover the pads at all, but it should go right up to them. If it overlaps onto them a bit, it’s no big deal.
Attach to Heat Spreader

Place the S1 and thermal pad onto the heat spreader plate, making sure to orient it so that the pads are towards the bigger slot, otherwise it won’t fit. Use the 4 M3x6mm screws to attach the S1 to the heat spreader plate.
Attach Motor to Mounting Plate
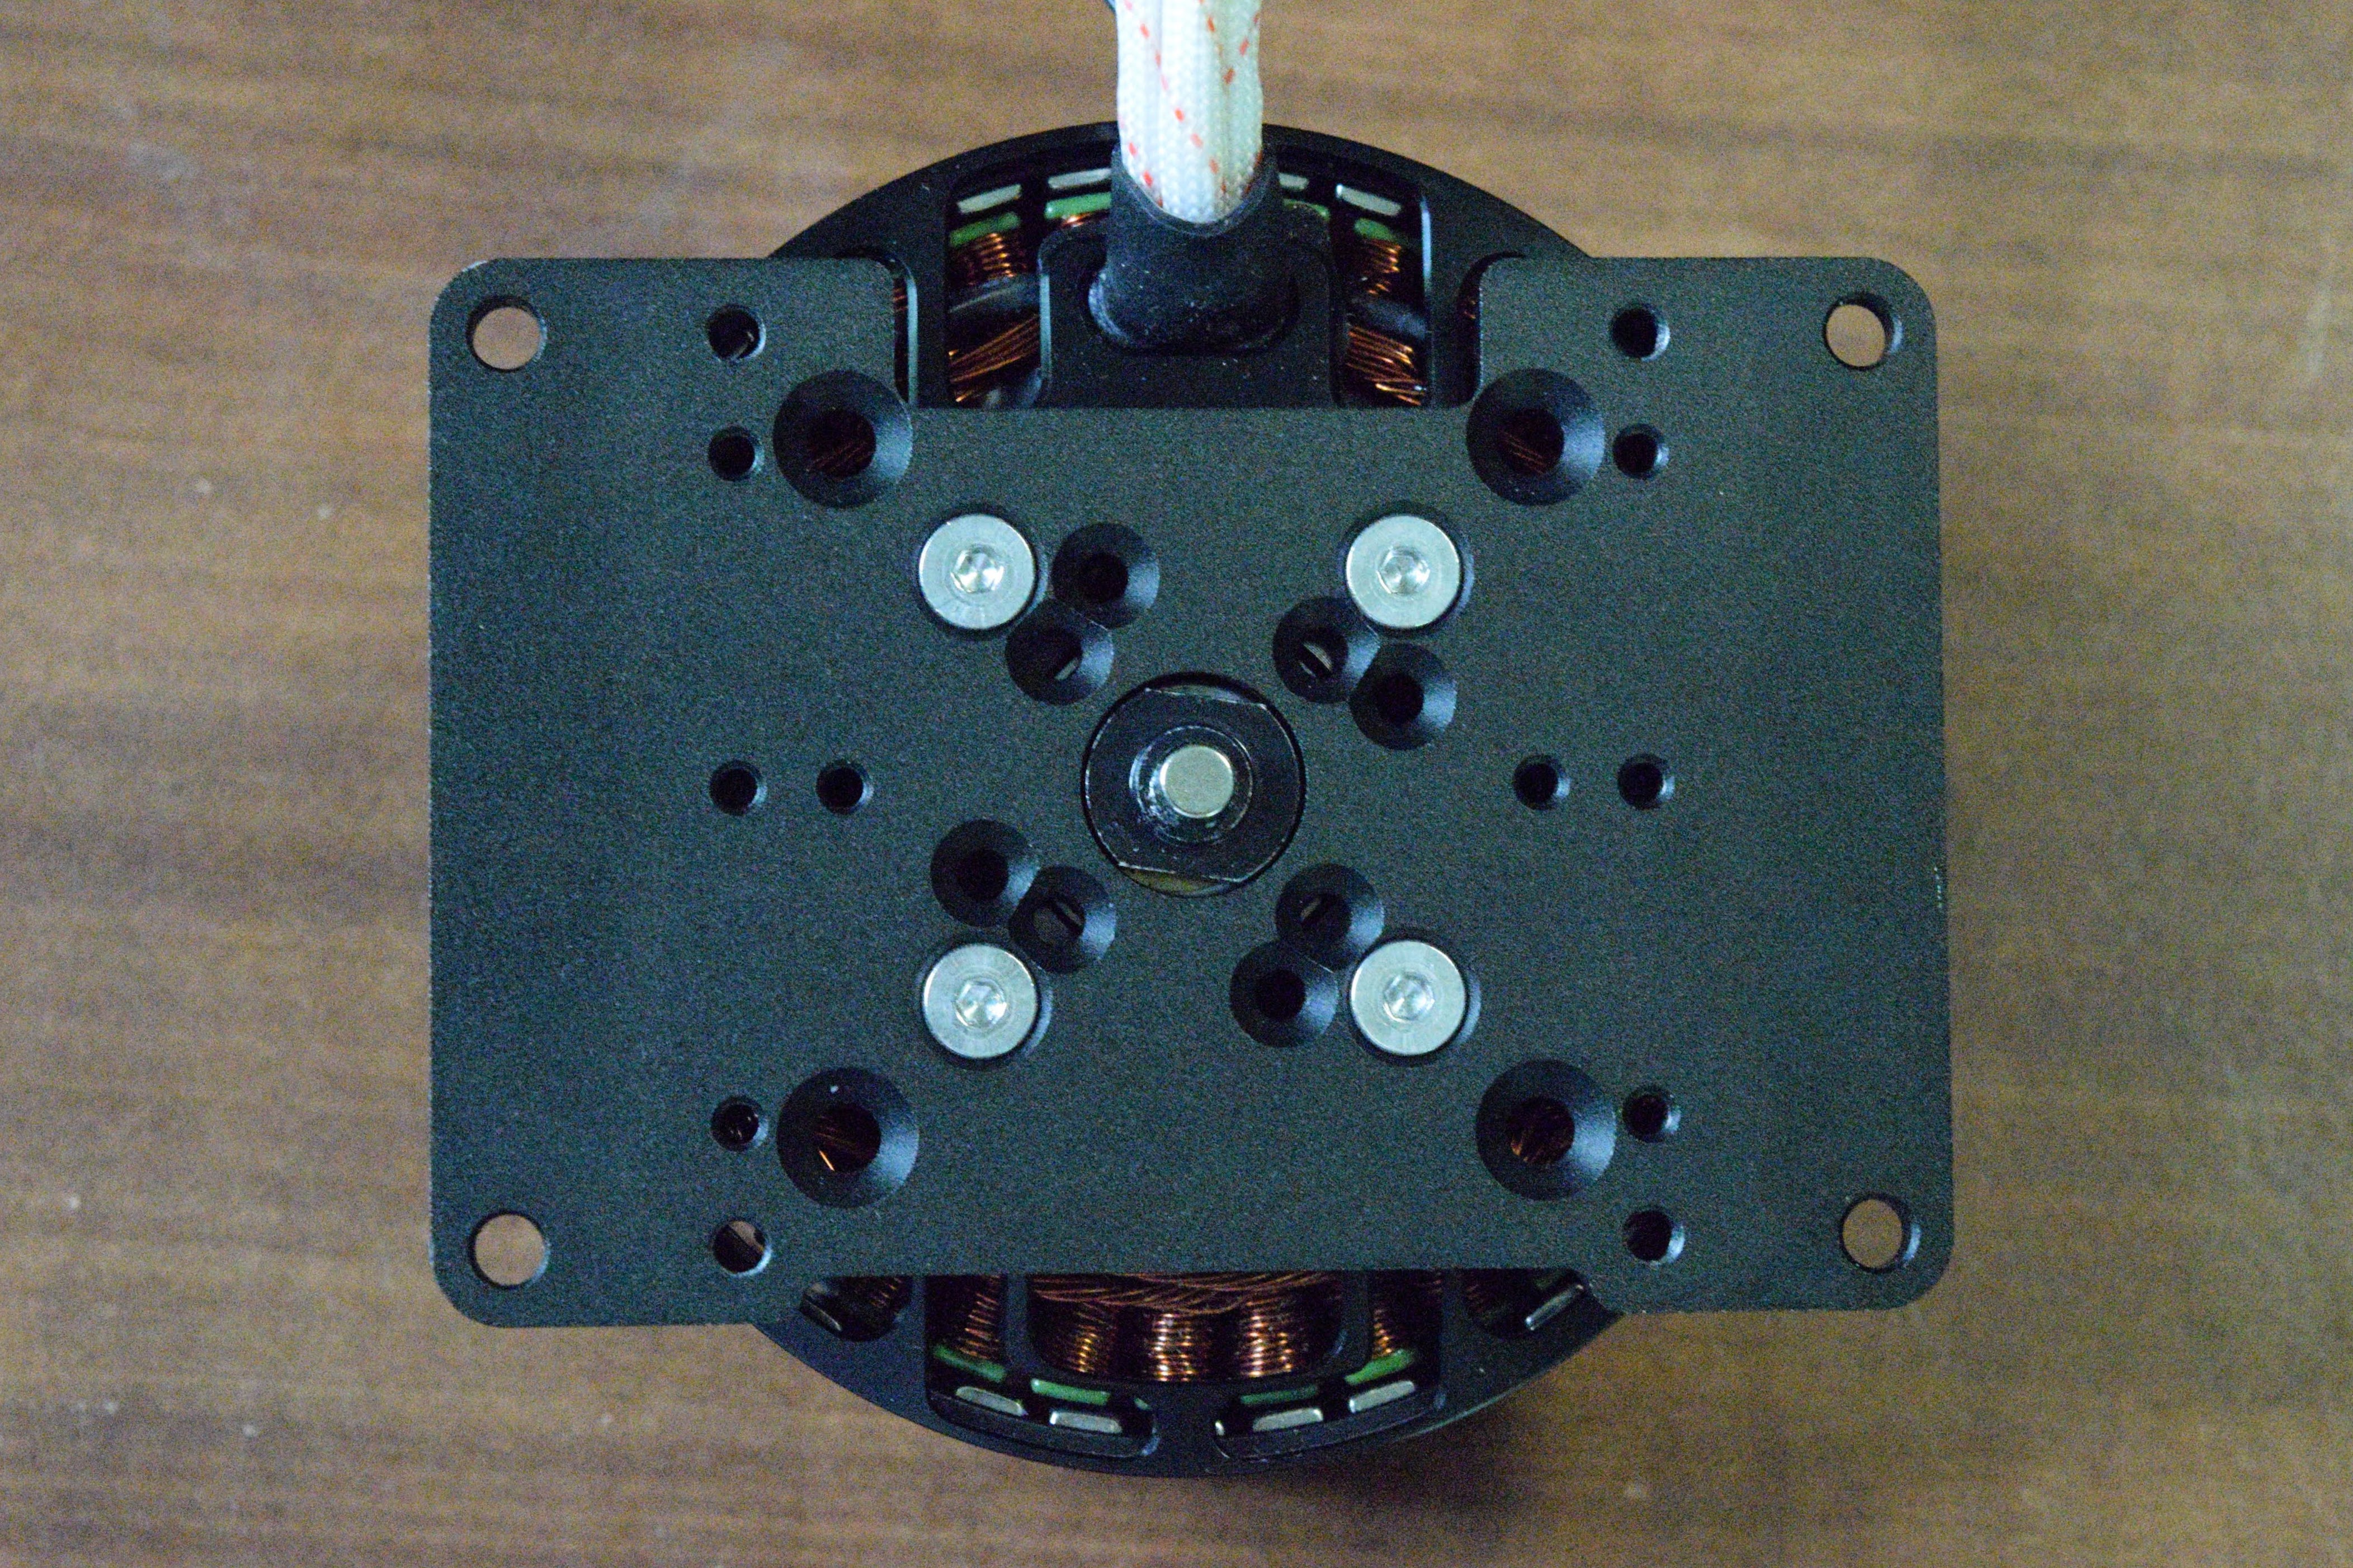
Use the 4 flat head M4x10mm screws to attach the motor mounting plate to the back of the motor. Make sure to orient the mounting plate as shown in the image (larger slot towards the motor wires).
Attach ODrive to Motor
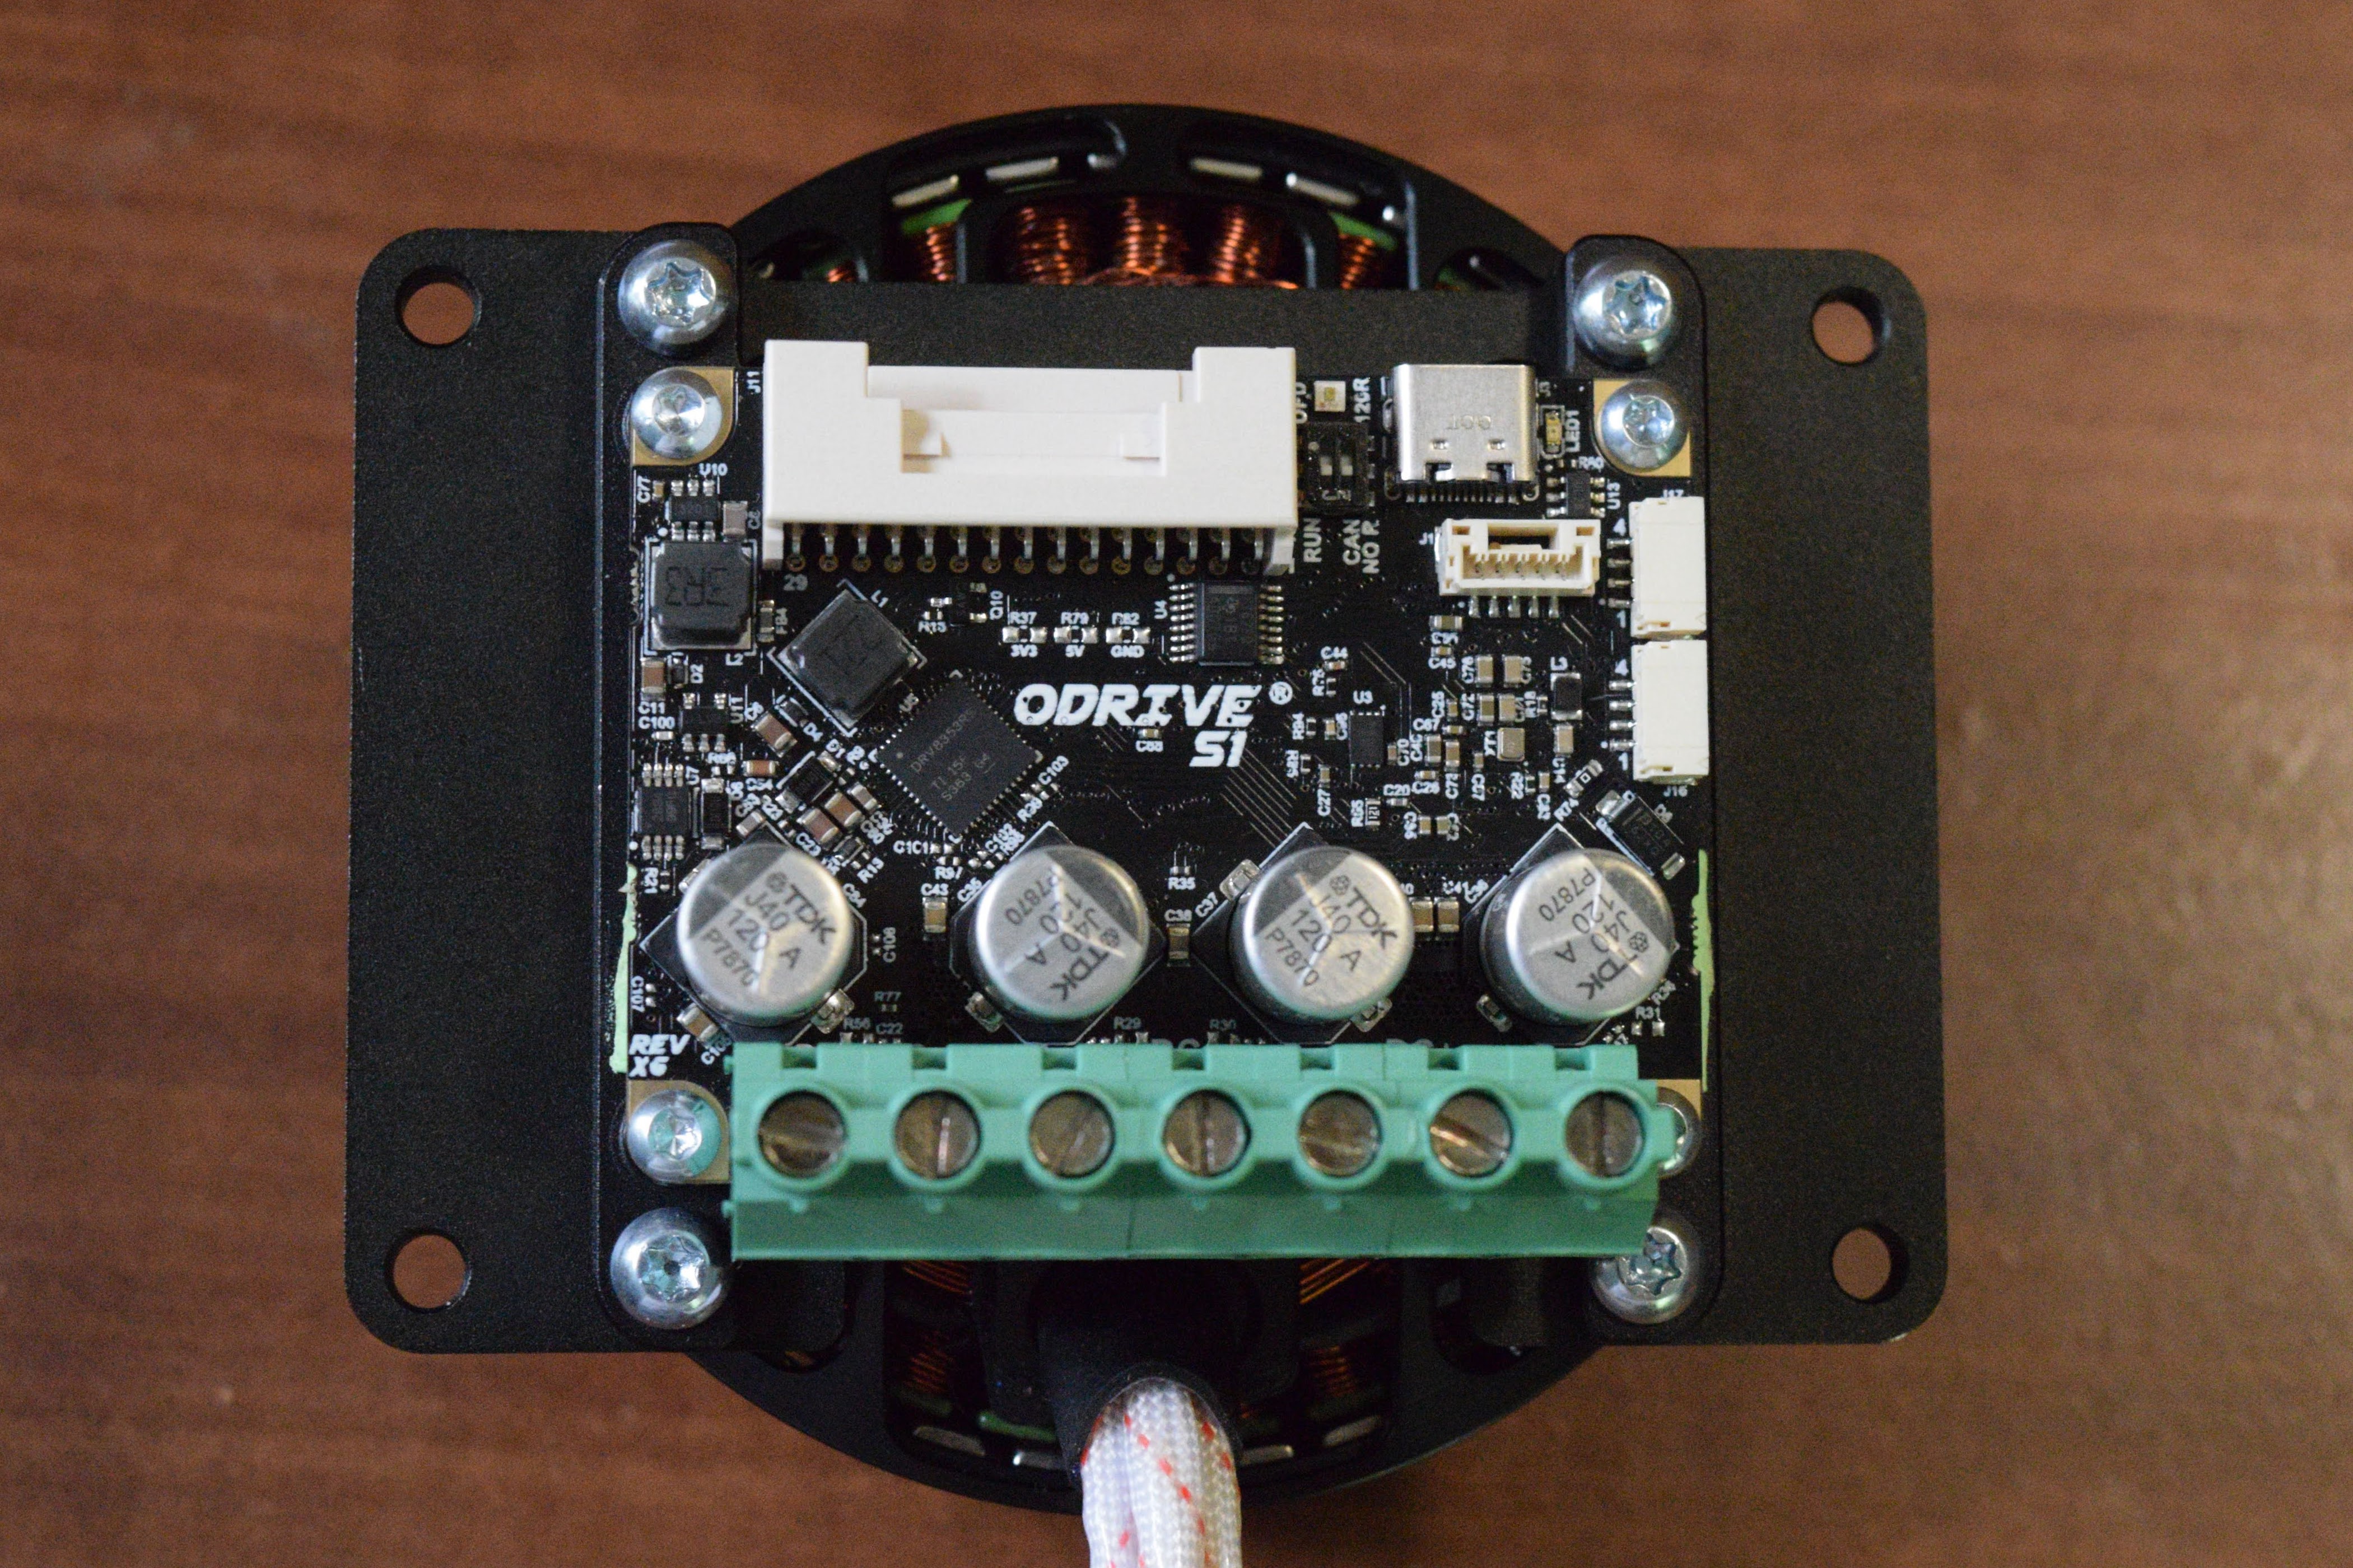
Place the S1 and heat spreader assembly on the motor mounting plate as shown in the image then use the remaining 4 M4x10mm screws to attach it.
Wiring
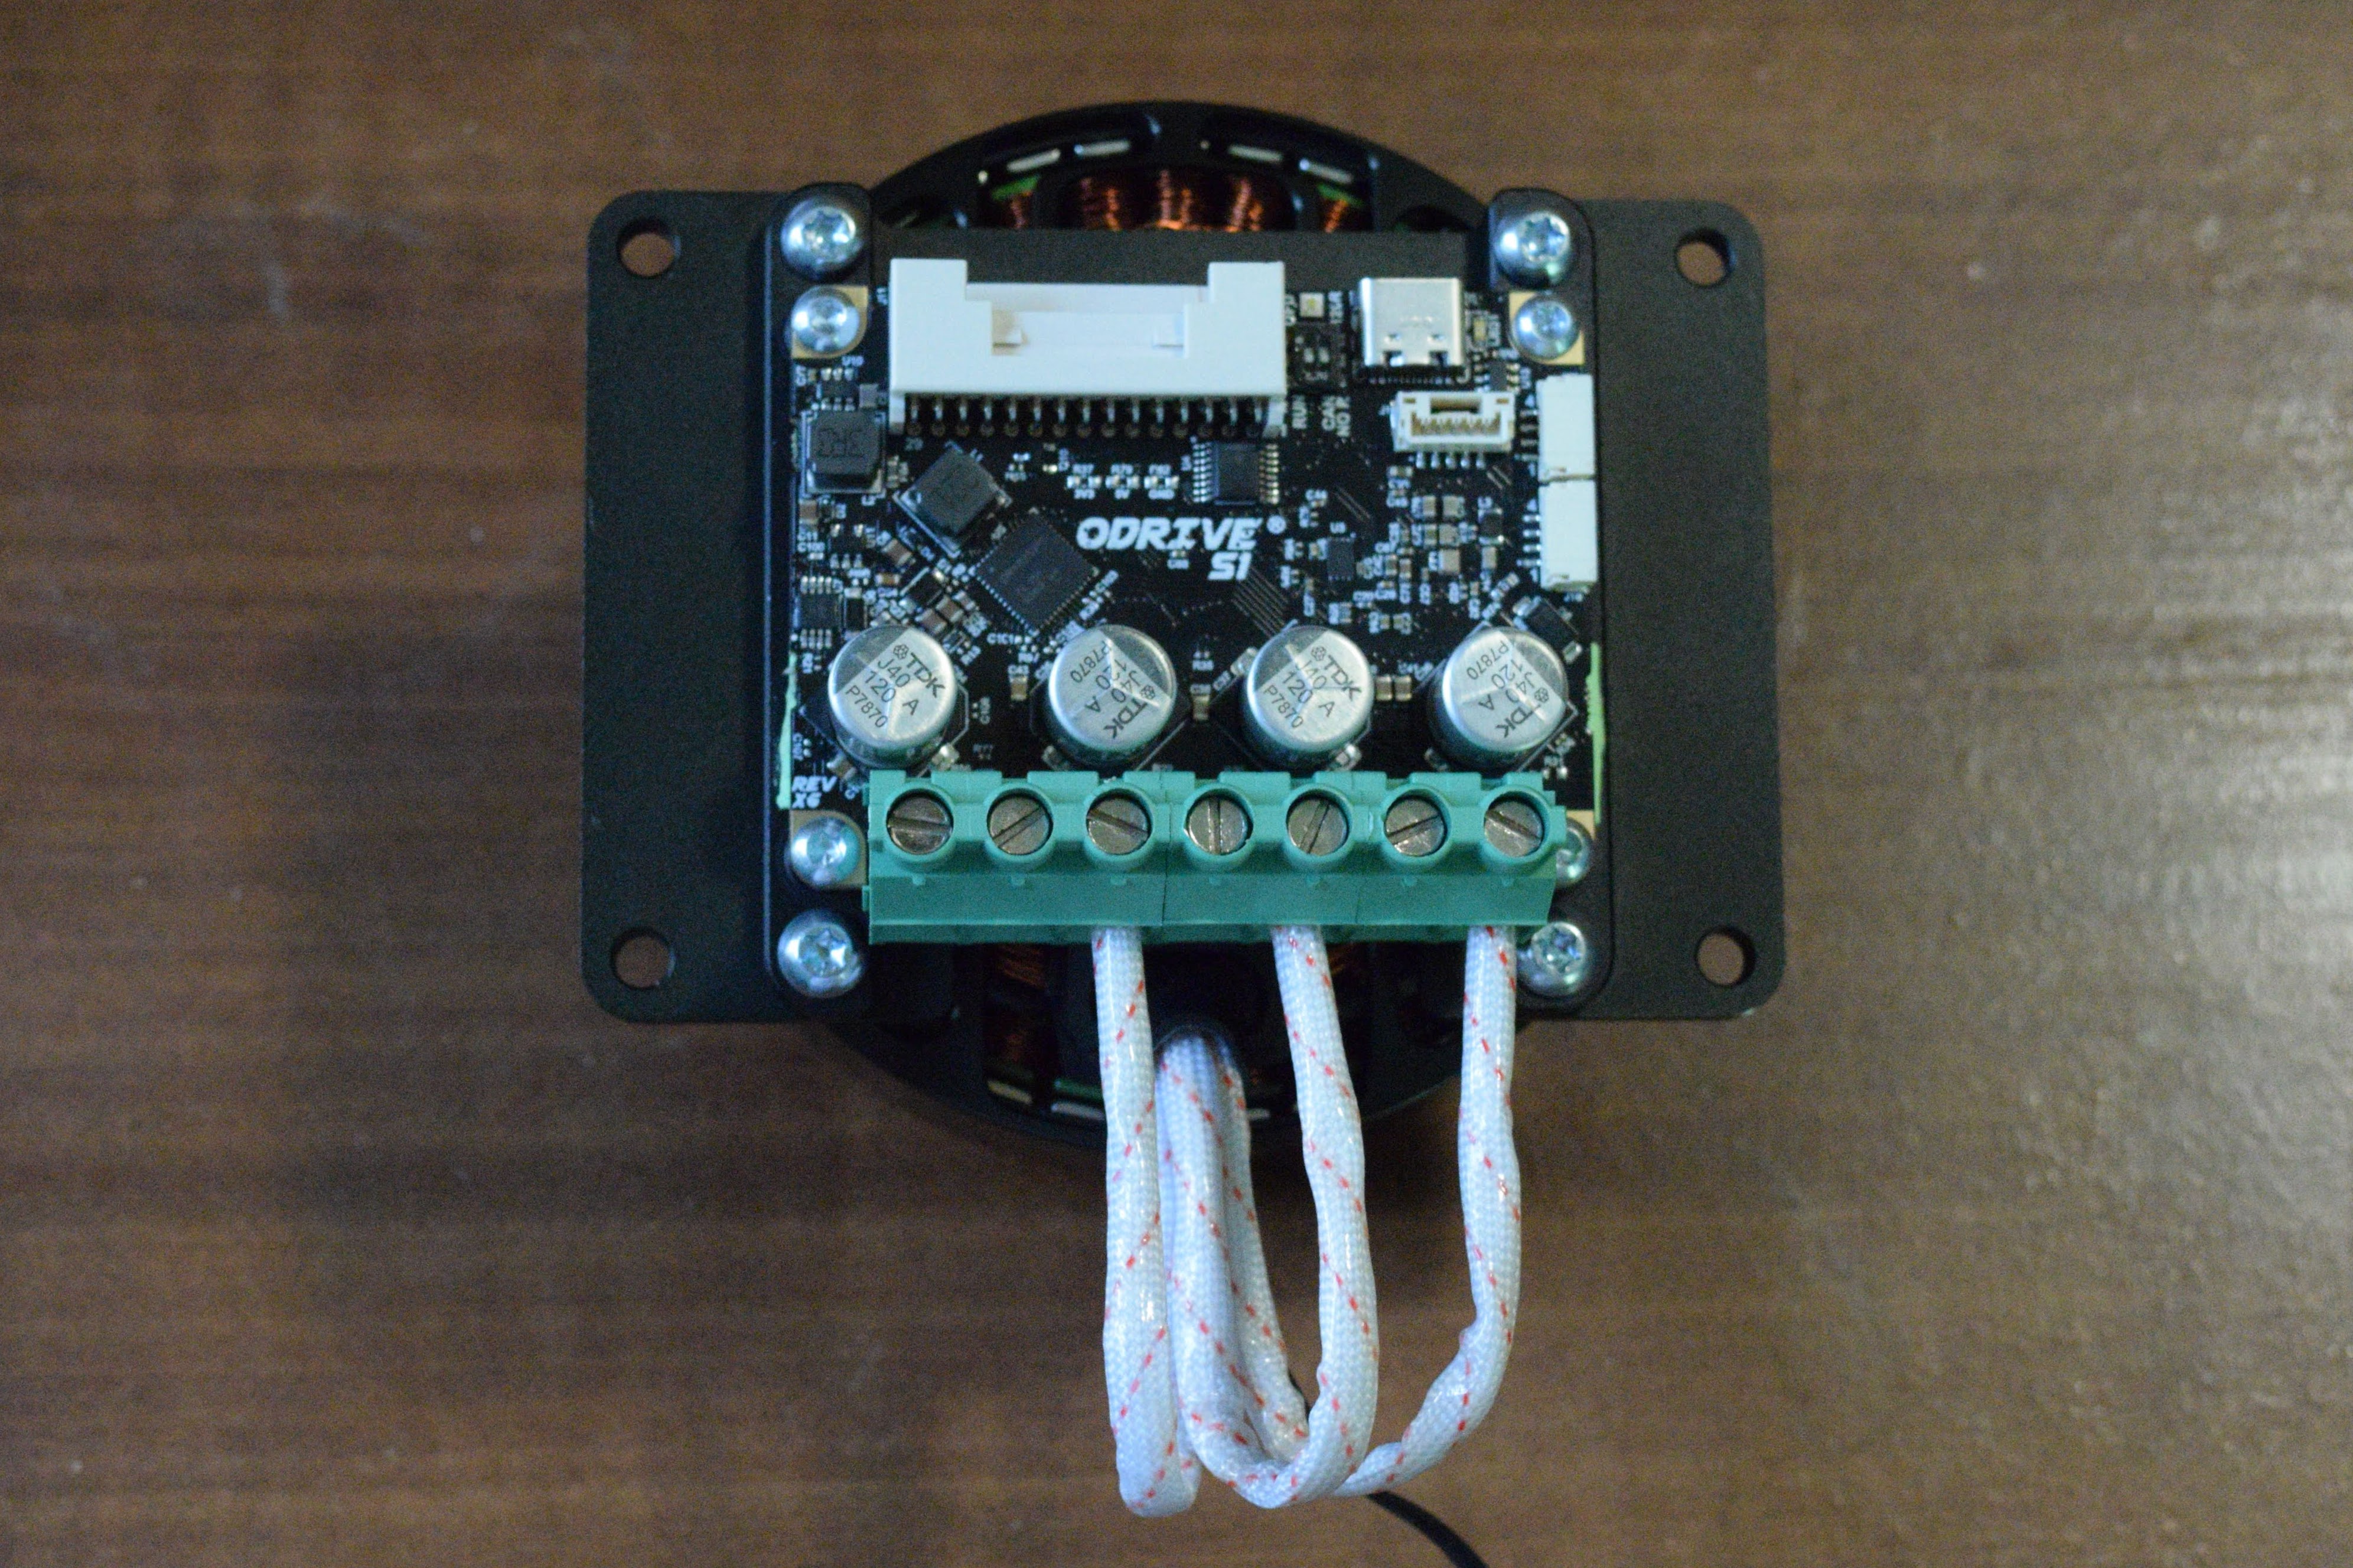
Finally, insert each of the motor phase wires into the S1 screw terminals and tighten the screw to hold them in. You’ll also need to provide power and, if you want to use a brake resistor, wires to that. Pinout information can be found in the S1 Datasheet. You should also solder two of the wires from the S1 harness kit to the motor thermistor wires and insert them into pins 13 and 14 of the S1 IO connector, marked thermistor+ and thermistor- here.
Software Setup
Using a USB isolator, connect the S1 to your computer via the USB-C port. Then, go to the ODrive Web GUI using a WebUSB compatible browser (typically Edge or Chrome, Firefox unfortunately does not work). On the “Power Source” page, enter information about your power source and whether you’re using a brake resistor. On the motor page, select “M8325S-100KV”. On the encoder page, select “Onboard Encoder”. Select a control mode on page 4, then go through all the steps on page 5. Make sure that when you run calibration, the shell of your motor is not touching anything, as it will spin. Now you’re ready to use your ODrive! As always, support is available on our discord or forums.