Controlling ODrive from an Arduino via UART
Overview
This page describes how to control an ODrive via UART using an Arduino and the ODriveArduino library.
This library is primarily intended for runtime usage, such as changing states, sending setpoints and reading position/velocity feedback. While it allows for the modification of any configuration variable, this is often much easier to accomplish in the ODrive GUI or the odrivetool.
More information about the underlying protocol can be found here.
Warning
This library is intended for hobby users so they can quickly build cool projects. The library does not handle checksums or resends and is based on UART which is susceptible to electrical interference. For professional use, we recommend to use CAN bus instead.
Connecting the Arduino to the ODrive
First, connect your Arduino to the ODrive.

Arduino Uno |
ODrive [1] |
|---|---|
Pin 8 [2] |
UART TX |
Pin 9 [2] |
UART RX |
5V |
ISO VDD [3] |
GND |
ISO GND |
Note
Some boards (like Arduino Uno) have only one hardware UART, so this example uses SoftwareSerial for communicating with the ODrive, while the hardware serial is used for talking to the PC. However if you have the option, it’s preferrable to use a hardware serial port (Serial, Serial1, …) for better performance and reliability. The example sketch below lists options for the most common boards.
Configuring the ODrive
Next, use the Web GUI or odrivetool to configure the ODrive according to your application.
For this example, the ODrive should be set to Filtered Position Control mode with a bandwidth of 20 rad/s (this value is recommended based on the Arduino Uno’s send rate and can be increased if you’re using a faster board).

odrv0.axis0.controller.config.control_mode = ControlMode.POSITION_CONTROL
odrv0.axis0.controller.config.input_mode = InputMode.POS_FILTER
odrv0.axis0.controller.config.input_filter_bandwidth = 20
Please verify that you can send position setpoints from the GUI or odrivetool before proceeding with the next steps.
Warning
If you have already enabled UART and come back to this step to change something, make sure to disable UART first or disconnect/unpower the Arduino. Otherwise the Arduino sketch might interfer with the GUI.
Setting Up ODrive for UART
To allow your ODrive to communicate with the Arduino, you must enable UART. To do this, set the following configuration (either in odrivetool or in the GUI on the Inspector).
The baudrate must match the value in the Arduino sketch. The recommended value is 19200 if you’re using a software serial port (Arduino UNO) and 115200 if you’re using a hardware serial port (most other Arduinos / Teensy’s). See note above for details.
odrv0.config.uart_a_baudrate = 19200 # OR 115200 - see note above
odrv0.config.enable_uart_a = True
odrv0.config.gpio12_mode = GpioMode.UART_A
odrv0.config.gpio13_mode = GpioMode.UART_A
odrv0.save_configuration()
odrv0.config.uart_a_baudrate = 19200 # OR 115200 - see note above
odrv0.config.enable_uart_a = True
odrv0.config.gpio6_mode = GpioMode.UART_A
odrv0.config.gpio7_mode = GpioMode.UART_A
odrv0.save_configuration()
Installing the ODriveArduino Library
Open your Arduino IDE.
Go to Sketch > Include Library > Manage Libraries.
In the Library Manager, type “ODriveArduino” into the search box.
Click on the entry for the ODriveArduino library, then click “Install”.
Example Sketch
Finally, upload the following example sketch to the Arduino. You can also find this under File > Examples > ODriveArduino. This example will put the ODrive into closed loop control and then move the motor back and forth in a sine wave pattern.
 1
 2#include <ODriveUART.h>
 3#include <SoftwareSerial.h>
 4
 5// Documentation for this example can be found here:
 6// https://docs.odriverobotics.com/v/latest/guides/arduino-uart-guide.html
 7
 8
 9////////////////////////////////
10// Set up serial pins to the ODrive
11////////////////////////////////
12
13// Below are some sample configurations.
14// You can comment out the default one and uncomment the one you wish to use.
15// You can of course use something different if you like
16// Don't forget to also connect ODrive ISOVDD and ISOGND to Arduino 3.3V/5V and GND.
17
18// Arduino without spare serial ports (such as Arduino UNO) have to use software serial.
19// Note that this is implemented poorly and can lead to wrong data sent or read.
20// pin 8: RX - connect to ODrive TX
21// pin 9: TX - connect to ODrive RX
22SoftwareSerial odrive_serial(8, 9);
23unsigned long baudrate = 19200; // Must match what you configure on the ODrive (see docs for details)
24
25// Teensy 3 and 4 (all versions) - Serial1
26// pin 0: RX - connect to ODrive TX
27// pin 1: TX - connect to ODrive RX
28// See https://www.pjrc.com/teensy/td_uart.html for other options on Teensy
29// HardwareSerial& odrive_serial = Serial1;
30// unsigned long baudrate = 115200; // Must match what you configure on the ODrive (see docs for details)
31
32// Arduino Mega or Due - Serial1
33// pin 19: RX - connect to ODrive TX
34// pin 18: TX - connect to ODrive RX
35// See https://www.arduino.cc/reference/en/language/functions/communication/serial/ for other options
36// HardwareSerial& odrive_serial = Serial1;
37// unsigned long baudrate = 115200; // Must match what you configure on the ODrive (see docs for details)
38
39
40ODriveUART odrive(odrive_serial);
41
42void setup() {
43  odrive_serial.begin(baudrate);
44
45  Serial.begin(115200); // Serial to PC
46
47  delay(10);
48
49  Serial.println("Waiting for ODrive...");
50  while (odrive.getState() == AXIS_STATE_UNDEFINED) {
51    delay(100);
52  }
53
54  Serial.println("found ODrive");
55
56  Serial.print("DC voltage: ");
57  Serial.println(odrive.getParameterAsFloat("vbus_voltage"));
58
59  Serial.println("Enabling closed loop control...");
60  while (odrive.getState() != AXIS_STATE_CLOSED_LOOP_CONTROL) {
61    odrive.clearErrors();
62    odrive.setState(AXIS_STATE_CLOSED_LOOP_CONTROL);
63    delay(10);
64  }
65
66  Serial.println("ODrive running!");
67}
68
69void loop() {
70  float SINE_PERIOD = 2.0f; // Period of the position command sine wave in seconds
71
72  float t = 0.001 * millis();
73
74  float phase = t * (TWO_PI / SINE_PERIOD);
75
76  odrive.setPosition(
77    sin(phase), // position
78    cos(phase) * (TWO_PI / SINE_PERIOD) // velocity feedforward (optional)
79  );
80
81  ODriveFeedback feedback = odrive.getFeedback();
82  Serial.print("pos:");
83  Serial.print(feedback.pos);
84  Serial.print(", ");
85  Serial.print("vel:");
86  Serial.print(feedback.vel);
87  Serial.println();
88}
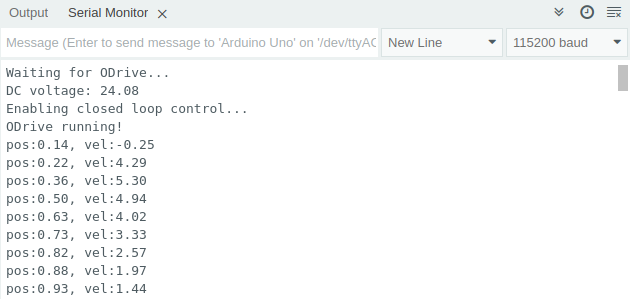
Below is a screenshot of the expected output in the Arduino IDE’s Serial Monitor (Tools > Serial Monitor):
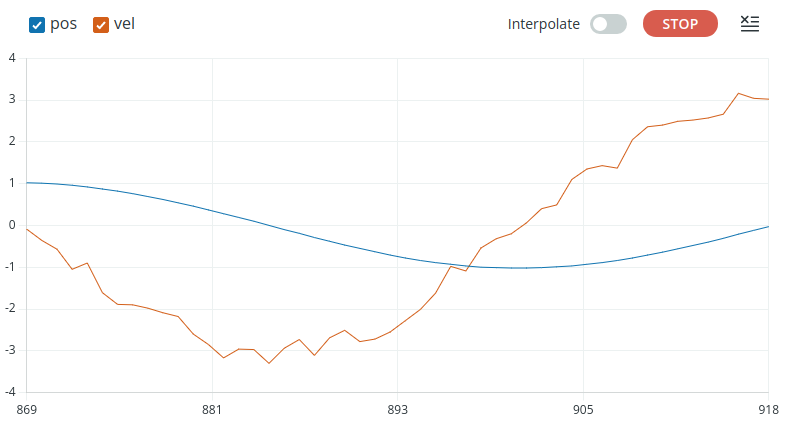
And here’s the Serial Plotter (Tools > Serial Plotter):
Troubleshooting
Arduino hangs at Waiting for ODrive...
Something appears to be wrong with the connection between Arduino and ODrive.
Comment out the
whileloop insetup(). This will make the Arduino continuously send setpoints, regardless of ODrive state. You can now inspectaxis0.controller.input_posin the GUI or odrivetool to see if it changes over time.If yes, the Arduino => ODrive connection is working properly and the problem appears to be in the ODrive => Arduino direction. Double-check the corresponding wire.
If not, the Arduino => ODrive connection is not working properly. Double check all wires and the ODrive configuration.
If you have a logic analyzer or oscilloscope, measure the data lines in both directions.
Arduino hangs at Enabling closed loop control...
This means that the Arduino can talk to the ODrive and vice versa, but the ODrive refuses to enter closed loop control mode.
This can have lots of reasons (ODrive unpowered, ODrive not calibrated, etc.). The easiest way to find out why, is to open the GUI and check the status bar.
Motor makes “humming” noise while moving
If you’re using one of the direct input modes, this is expected because of the limited updated rate at which the Arduino sends setpoints. There are several ways to mitigate this:
Use one of the input modes that are suitable for low update rates: Trajectory Control or Filtered Position Control with a sufficiently low bandwidth as described in Configuring the ODrive.
Lower the position gain (
axis0.controller.config.pos_gain).Optimize the setpoint send rate by removing unneeded lines from the example or using a higher performance Arduino-compatible device.
Arduino Library Reference
-
class ODriveUART
Public Functions
-
ODriveUART(Stream &serial)
Constructs an ODriveUART instance that will communicate over the specified serial port.
-
void clearErrors()
Clears the error status of the ODrive and restarts the brake resistor if it was disabled due to an error.
-
void setPosition(float position)
Sends a new position setpoint.
-
void setPosition(float position, float velocity_feedforward)
Sends a new position setpoint with a velocity feedforward term.
-
void setPosition(float position, float velocity_feedforward, float torque_feedforward)
Sends a new position setpoint with velocity and torque feedforward terms.
-
void setVelocity(float velocity)
Sends a new velocity setpoint.
-
void setVelocity(float velocity, float torque_feedforward)
Sends a new velocity setpoint with a torque feedforward term.
-
void setTorque(float torque)
Sends a new torque setpoint.
-
void trapezoidalMove(float position)
Puts the ODrive into trapezoidal trajectory mode and sends a new position setpoint.
-
ODriveFeedback getFeedback()
Requests the latest position and velocity estimates.
Returns pos = 0.0 and vel = 0.0 in case of a communication error.
-
inline float getPosition()
Requests the latest position estimate.
Returns 0.0 in case of a communication error.
-
inline float getVelocity()
Requests the latest velocity estimate.
Returns 0.0 in case of a communication error.
-
void setState(ODriveAxisState requested_state)
Tells the ODrive to change its axis state.
-
ODriveAxisState getState()
Requests the current axis state from the ODrive.
Returns AXIS_STATE_UNDEFINED in case of a communication error.
-
ODriveUART(Stream &serial)
-
struct ODriveFeedback