Web GUI
The ODrive Web GUI allows for quick setup, interactive control and firmware updates of your ODrive directly from the browser.
Open Web GUI →Connecting over USB
Warning
USB and DC power may only be used together if you have a USB isolator on each ODrive. Without one you risk a ground loop, which can damage the ODrive or your computer. See Ground Loops for details.
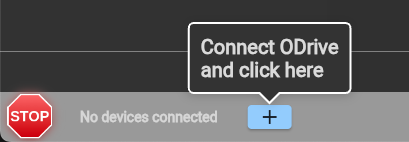
Connect the ODrive to your computer via a USB isolator, then click the + button in the bottom bar.
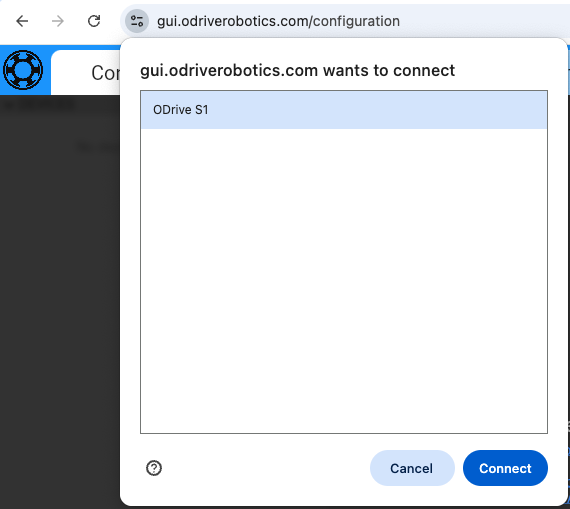
The browser asks which device to share with the GUI. Select your ODrive and click Connect.
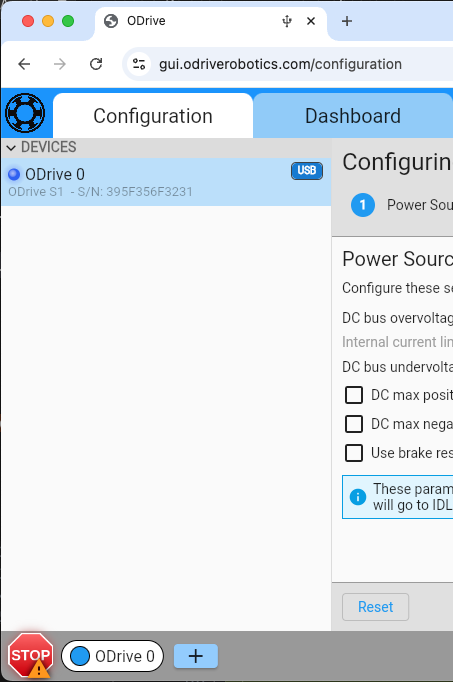
The ODrive now shows up under DEVICES. Proceed with setup by following the steps in the Configuration tab.
If your ODrive doesn’t connect, see Troubleshooting.
Connecting over CAN
⇒ Requires firmware 0.6.11 or newer
The Web GUI can connect to ODrives over CAN using a USB-CAN Adapter.
Note
On Linux, the adapter is claimed by the SocketCAN kernel driver by default and must be unbound first. See Unbinding from SocketCAN on Linux for instructions.
For general advice on CAN wiring, see CAN hardware setup.
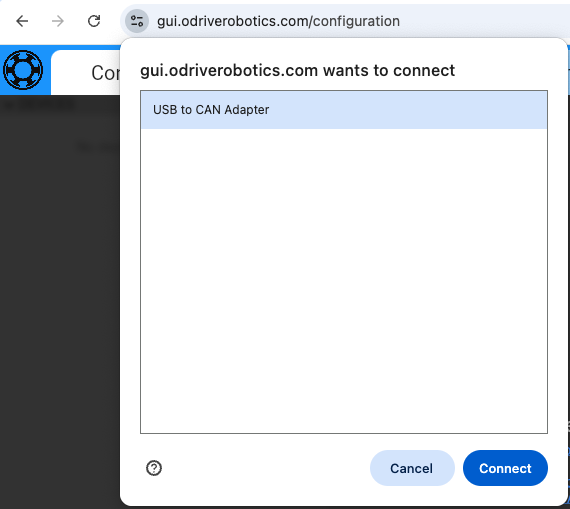
Connect the USB-CAN Adapter to the ODrive and to your computer, then click the + button in the bottom bar.
The browser asks which device to share with the GUI. Select USB to CAN Adapter and click Connect.
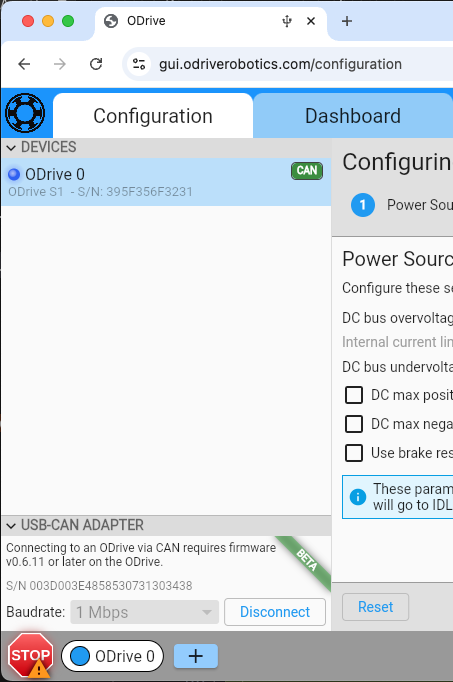
The adapter now appears in the USB-CAN ADAPTER panel at the bottom of the sidebar. Select the baudrate of your bus and click Connect.
By default the ODrive detects the baudrate automatically, so you can pick any value. For optimal performance we recommend 1 Mbps. See also Which baudrate to select?.
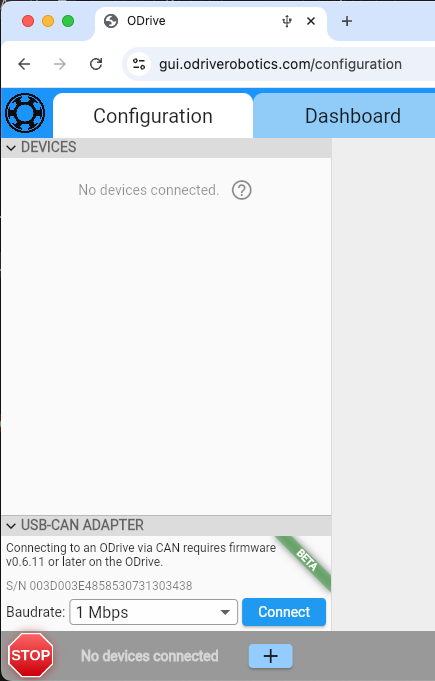
All ODrives found on the bus show up under DEVICES, marked with a CAN badge. Proceed with setup by following the steps in the Configuration tab.
If no devices appear, check the wiring and termination (Hardware Setup) and make sure the ODrive runs firmware 0.6.11 or newer.
Troubleshooting
Frequent Issues
Only browsers with WebUSB support are supported (Chrome, Edge, Opera and other Chromium-based browsers). In particular, Firefox and Safari are not supported.
ODrive v3.6 is not supported by the Web GUI, neither are derived boards from vendors other than ODrive Robotics. All active ODrives sold on our web shop are supported.
Close all other programs that might be accessing the ODrive (GUI in another browser tab,
odrivetool, custom Python scripts, …).Windows: If you’ve used Zadig before, revert changes done by Zadig. Zadig is not required for ODrives other than 3.6 and can interfere with the GUI.
Windows: Go to “Device Manager” > “ODrive […] Native Interface” > right click > “Properties”. It should say “Device Type: WinUSB” or similar. If it says “libusb-win32” instead, click “Driver” > “Uninstall” and replug the device. There have been cases where Windows confuses newer ODrives for a previously connected ODrive v3.6, which can be the reason for the incorrect driver selection.
Linux: remember to set up the
udevrules:sudo bash -c "curl https://cdn.odriverobotics.com/files/odrive-udev-rules.rules > /etc/udev/rules.d/91-odrive.rules && udevadm control --reload-rules && udevadm trigger"
You must replug the device after this.
Linux: If you’re connecting via a USB-CAN Adapter, make sure you followed Unbinding from SocketCAN on Linux.
Ubuntu: AppArmor might deny the browser’s access to USB. This notably happens when the browser was installed via Ubuntu’s App manager (Snap).
Ubuntu <24: Open “Ubuntu Software”, navigate to “Installed” > “Chrome” (or the browser you’re using) > “Permissions” and turn on “Access USB hardware directly”.
Ubuntu 24+: Open “Settings”, navigate to “Apps” > “Chrome” (or the browser you’re using) and turn on “Access USB hardware directly”.
Other Ubuntu-based distributions: Manually connect the browser snap to the
raw-usbplug. For instance, for the Chromium browser, runsnap connect chromium:raw-usbin the terminal.
Brave browser: turn off Brave Shield. Brave Shield randomizes USB serial numbers, which is unexpected by the GUI and prevents it from working correctly.
Gather more info
If the tips above didn’t solve your issue, here are some more steps that can help isolate the problem. Please contact us for further help and include any diagnostics information that you gathered.
Check the browser log (Windows/Linux: Ctrl+Shift+J, macOS: Cmd+Option+J). You can export the whole log as text file by doing right-click > “Save as…” on the Console.
Check if the operating system recognizes the ODrive:
Windows: In the search bar, type “Device Manager” and open it. Enable “View” > “Show all devices”. Look for “ODrive Native Interface” under “Universal Serial Bus devices” or “Other devices”. If you can find it, right-click on it, open “Properties” and check which driver is installed (should be winusb.sys).
Linux: Run
lsusbin a terminal. Also check for errors in the kernel log (sudo dmesg -w) while plugging in the device.macOS: In Spotlight, type “System Information” and open it. Click on “USB” to see a list of all USB devices. Alternatively, run
ioreg -p IOUSBfrom the Terminal.
In Chrome, navigate to
chrome://device-log/and check for log messages when you plug in the ODrive.In Chrome, navigate to
chrome://usb-internals/> “Devices” and see if the ODrive shows up there.Try with a different browser.
If possible, try on a different computer (and on a different operating system).
Data collection and analytics
When analytics are enabled, the Web GUI collects anonymous usage and error statistics to help improve reliability, prioritize features and diagnose problems. The following metrics are collected:
Environment metadata (e.g. browser type, operating system, IP address)
Usage events (e.g. page navigation, selected button clicks)
Error events (e.g. ODrive connection issues, unexpected GUI conditions)
ODrive configuration settings
Firmware version and hardware version of connected ODrives
A browser session identifier
Encrypted serial numbers of connected ODrives. The encryption key remains local to your browser session unless you choose to share it with us based on instructions from ODrive support.
The data is stored and processed by third-party storage & analytics providers (Google Analytics, Google Firebase) who may use some of the data according to their usage policies. Outside of these services, GUI analytics data is not shared outside of ODrive Robotics.
You can disable analytics at any time by clicking “?” in the top right corner of the GUI and then unchecking “Allow anonymous collection of usage statistics” in the bottom right corner.